Entertaining Tips
Flowerpot Bird Feeder Station
To make your own bird feeder station, begin with a flower pot as your base and two saucers. Then, drill holes in the saucers. Take one of them and attach the pot to it with glue, lining up the holes. Let the pot and saucer dry overnight. Thread the 1/4 lock nut onto the rod and temporarily attach the finial to the end to make it easier to hold the rod while threading the lock nut. Attach the rod by slipping a washer under the lock nut, then thread the end through the holes of both pot and saucer. Attach another washer and the finial to the bottom and tighten the lock nut with a longer-handled crescent wrench. Add the lid by inverting the saucer, sliding it onto the threaded rod, adding a washer, and securing it with a wing nut. Attach a hook on the threaded rod and put the eye bolt into the coupling nut. Fill your feeder with bird seeds. Hang the feeder from a suitable location and enjoy watching the birds with a glass of Torresella Pinot Grigio.
Wine Bottle Design Vase
To craft your unique vase, flip your empty wine bottle upside down. Then, measure a string’s length from one bottom edge to the opposite side, adding 6 to 8 inches for flexibility. Cut eight more strings to match this length and arrange the strings into two sets of four, forming a cross shape. Tie the two sets together at the center, creating four rope sections. Securely knot one string from each section to its adjacent counterpart, forming the first row.
You’ll then wrap a rubber band or elastic around the bottle to hold the strings. Continue tying one string from each section to its neighboring section until you reach the end.
Wrap a piece of rope around the bottleneck and attach any loose strings to it. Complete the look by adding rope around the top of the bottleneck. Enjoy a glass of Torresella to celebrate your handiwork!

DIY Macramé Hanging Rack
To make a macramé hanging rack, gather a 3-4mm macramé cord, scissors, a 2-¾-inch wood stick, and a measuring tape. Cut eight pieces of macramé cord, each 17 feet long, and one three-feet long piece. Attach the eight long strands to the wood stick using a “Lark’s Head knot” and arrange them evenly.
Create square knots using two pairs of strands and the two outermost strands. For the crossover knot, square knot the outer pairs to 3 inches and the inner pairs to 5 inches. Continue this pattern until the third crossover. Braid that set for another 3 inches and match the other pairs to that length.
Once done, place your hats between the braids, loop the inner pairs around each hat, and repeat for additional hats. Adjust the cord length and spacing based on your preference and hat size. For the last strand, tie a knot and trim any pieces left uneven, giving the tails your desired length. Now you have a stylish macramé hat holder for organizing and displaying your hats in any corner of your house.
DIY Sushi Makeup Brush Holder
Start by gathering a sushi mat roller and a piece of ribbon slightly longer than the sushi mat. Then, begin threading the ribbon between the bamboo slits. Place your brushes on the mat, leaving space between the bamboo slits based on the different sizes of your brushes. Repeat the process depending on how many brushes you want to position on your sushi mat brush holder.
Once the brushes are woven in, cut the ends of the ribbon, leaving an inch on both sides. Take out your glue and apply it to each end, then fold it over to attach the ribbon to the bamboo. To finish, sew a button at one end, and on the opposite side of the button, thread a piece of yarn through one slit and tie a knot. Leave a gap that will allow you to close your new creation. Now you have an amazing brush holder to help keep your brushes organized.
DIY Wine Rack
Start by gathering a wooden crate and two to four glass hanger racks, depending on the size of your crate. Before attaching the hanger racks, paint your wooden crate in a color of your choice.
Let the paint dry completely before moving on to the next step. Next, attach the hanger racks inside the crate using screws or brackets. Make sure to give enough space and securely attach it to the crate. Once the hanger racks are in place, you can start arranging your wine glasses.
Finally, add your favorite Torresella wine bottles to the rack. Now, you have a stunning wine rack that adds a touch of your personal style to your home décor.
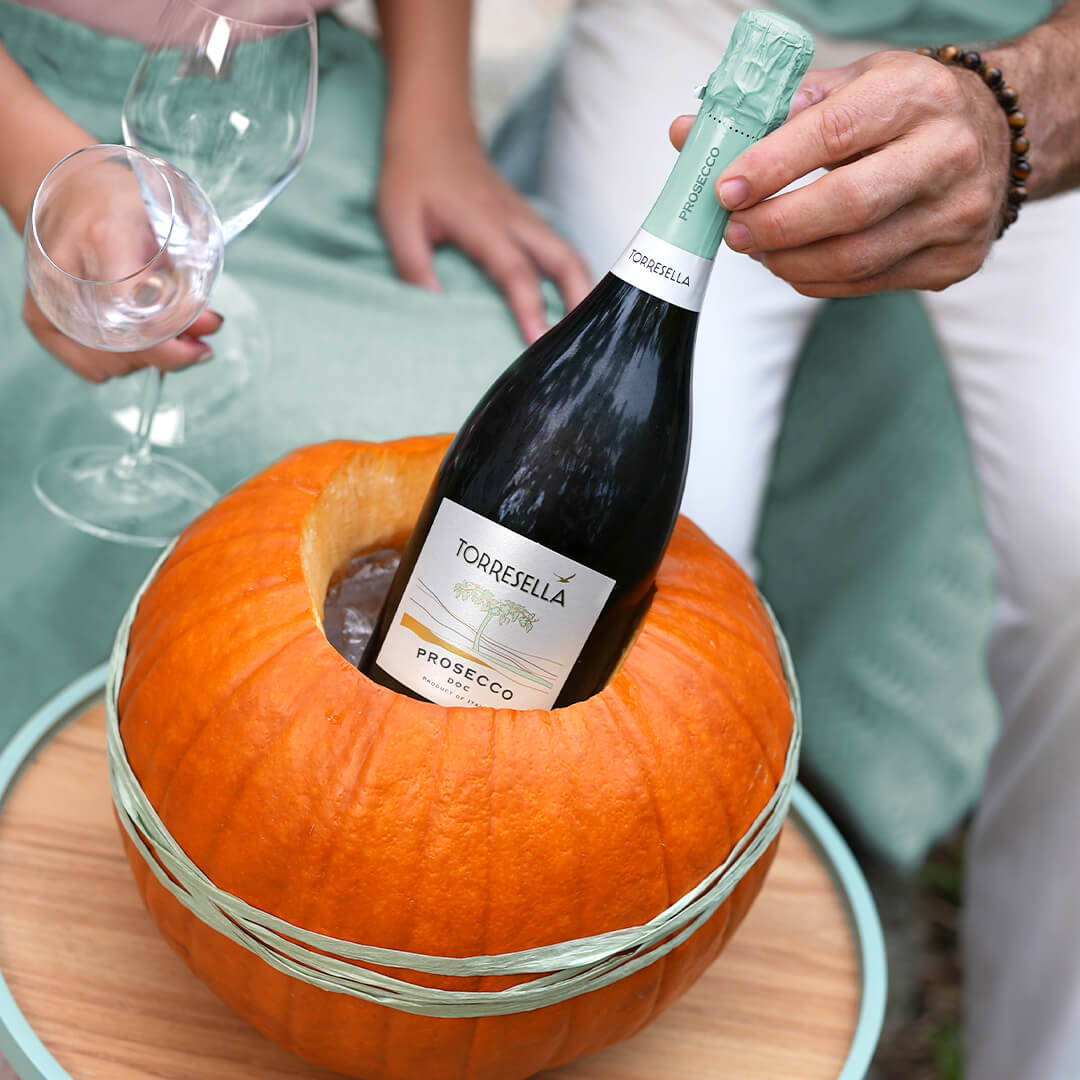
DIY Pumpkin Cooler
Looking for a creative way to chill your wine during Fall? Look no further – our DIY pumpkin wine cooler is the perfect solution. First, find a large pumpkin. It needs to be large enough to hold your crushed ice and a bottle of wine. Next, carve a large enough circle around the pumpkin top for a clean opening. Then use a large spoon to scoop out the insides of your pumpkin. Discard the inner seeds and pumpkin chunks. Use a paper towel to clean and dab away any extra moisture from the inside of your pumpkin. Then fill the pumpkin ¾ of the way with crushed ice. Place your bottle in the center and enjoy!
DIY Knot Blanket
Looking for a practical and fun DIY project that can keep you warm on chilly evenings or add a pop of color to your room decor? Look no further than knot blankets! Follow our easy guide to learn how to make one.
Start by gathering two pieces of fleece fabric in the same size and pattern/color. Place them evenly on one another, trimming excess material and cutting small, even squares from each corner. Next, create fringe along all sides by making 1-inch wide and 4-inch deep cuts through both layers of fabric. Tie the freshly cut strips of fabric together along the edges, securing them with a double knot. Repeat this process for all fringe sides and tighten any loose knots for a snug finish.
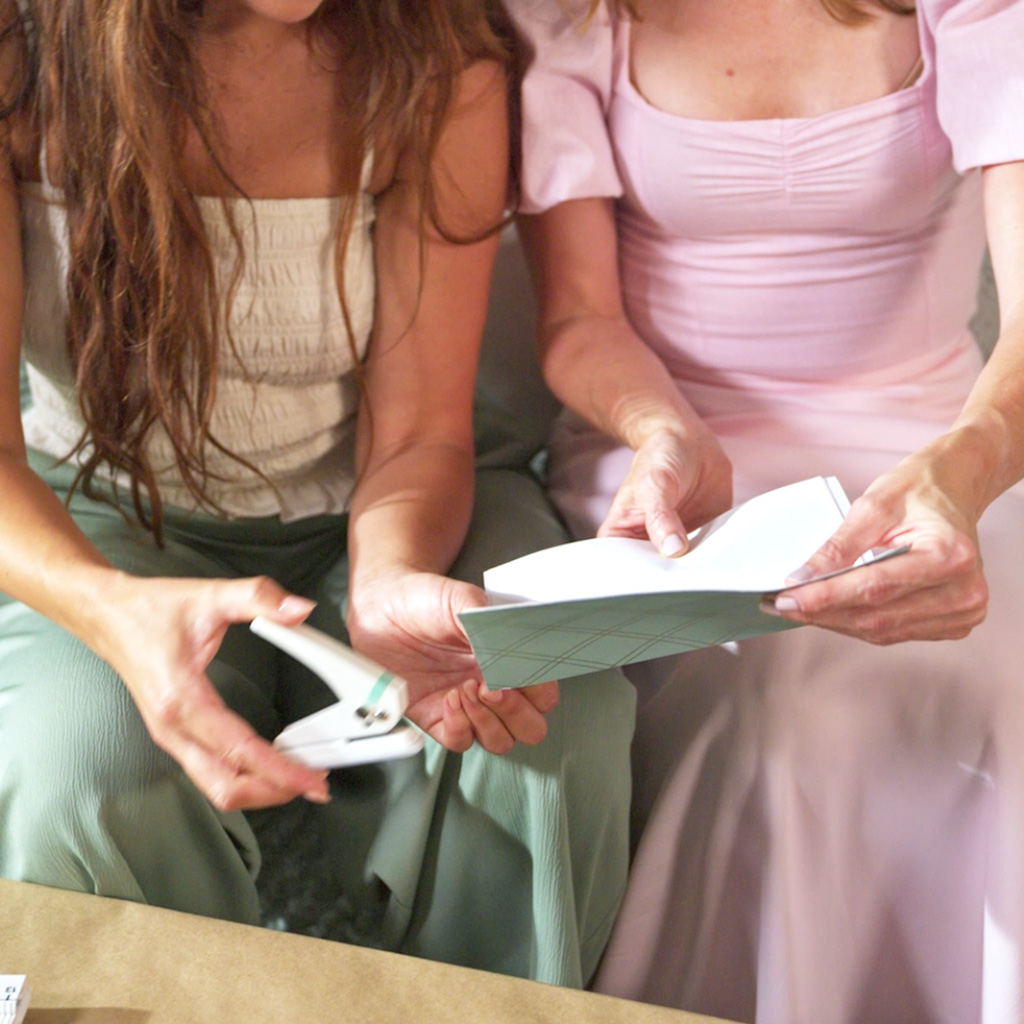
DIY Journal
To create a DIY journal, you will require the following materials: scissors, string, a hole puncher, printing paper, and decorative scrapbook paper.
First, ensure you have gathered all the necessary materials before starting the journal-making process. Determine the size of your journal and cut the paper pages to the desired size accordingly. Neatly stack the pages and align the edges precisely. Use the hole-puncher to create holes along one edge, enabling you to bind the pages together. Select a decorative scrapbook paper of your choice for the cover. Fold the scrapbook paper and trim the edges to fit the inner pages. Add your personal touch to the cover by decorating it. Finally, thread a string (or ribbon) through the holes to bind everything together. Your DIY journal is ready to hold all your thoughts, dreams, and cherished memories. Enjoy!
DIY Candle
To make your own candles, you will need wax, wicks, candle containers, a double boiler or heat-resistant container, a thermometer, and a stirring utensil. If desired, you can also use fragrance oils, dye chips, or dried flowers.
Start by melting the wax in your double boiler or heat-resistant container over low-medium heat, stirring occasionally. While the wax is melting, attach wicks to the container jars and make sure they are centered. You can also add fragrance oils and dye chips to the melted wax for added scent and color. Be sure to pour the melted wax carefully and let it cool. Once poured, you can also drop any dried flowers for decoration. Once the wax has cooled, trim the wicks before lighting the candle. Always prioritize safety by never leaving a burning candle unattended. Enjoy the process of making your very own DIY candles!
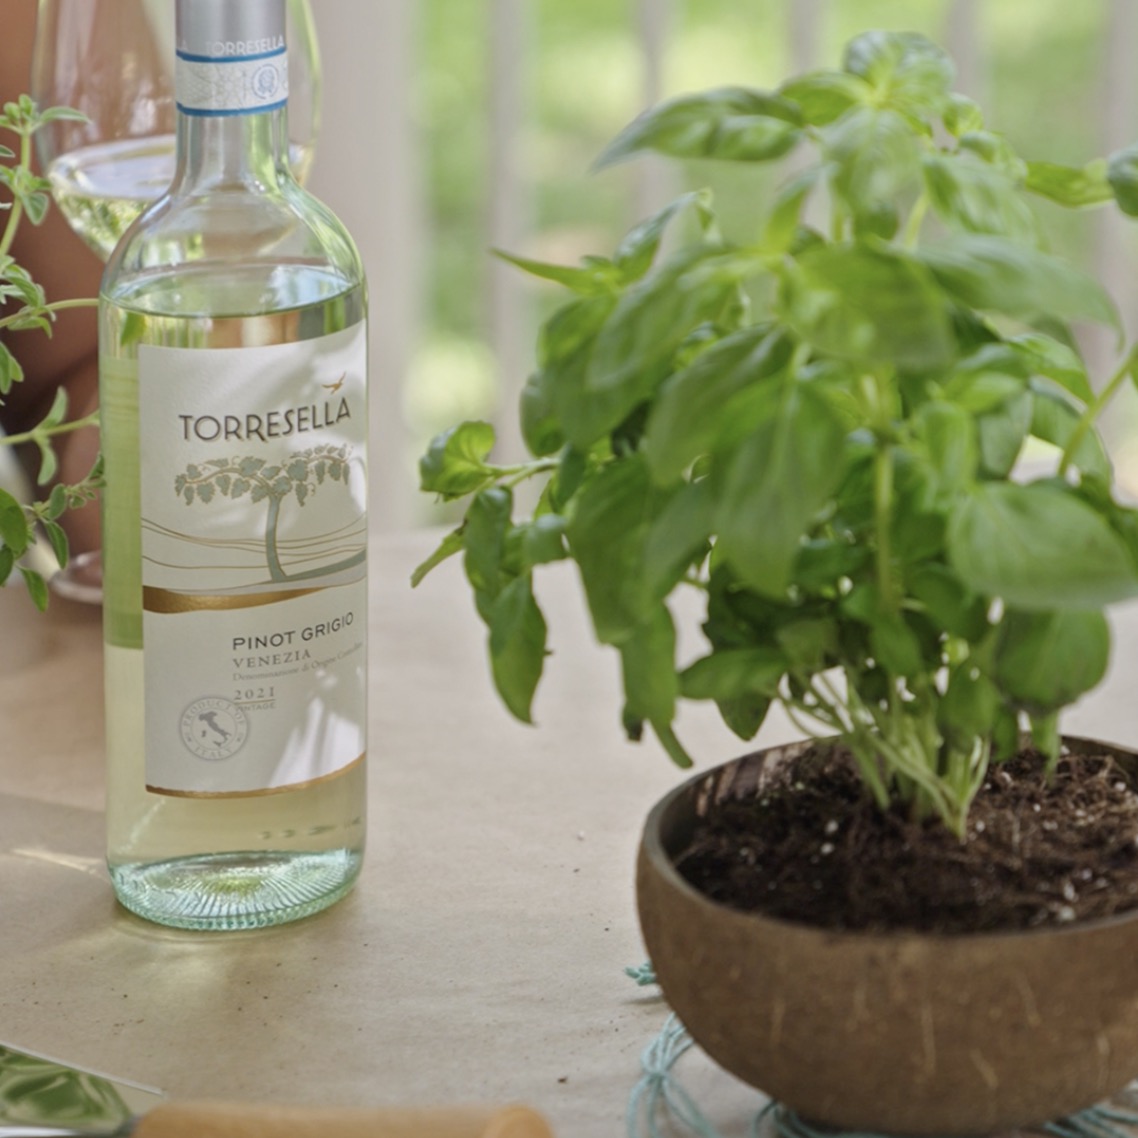
How-To: Coconut Herb Garden
For this DIY coconut herb garden, you will need coconuts, potting soil, gardening tools, and fresh herbs.
Are you looking for a fun and earthy activity to share with your gal pals? Try constructing a coconut herb garden! It’s a great way to add fresh herbs to your home. You will first divide your coconuts in half. Begin by creating a crack in the surface and following that cracked line evenly around your coconut with the appropriate cutting tool, or purchase coconut shells online. Next, completely clean out the inside of your coconut shells. Once cleaned, you can begin potting. Lay down an initial layer of potting soil, making a small dent in the center of the soil. You are now ready to start planting! Place your fresh herb into the indented soil and apply some pressure at the base of your plant to secure it. Once safely centered, you’re all done! Lightly water for a finishing touch.
DIY Leaf Art Tutorial
For this DIY Leaf Art, you will need a clear frame and a palm leaf.
This activity is a fun, easy, sustainable way to dress up your favorite spaces with some upcycled greenery. The technique you will use is called plain weave. Begin at the bottom of the palm leaf by bending the palm fronds (strips) at a 45-degree angle, one at a time. You can also fold it over the blade of a closed pair of scissors if needed. Repeat this for each palm frond, creating an over-under pattern. Ensure every strip is weaved opposite the other to create a braided design.
Next, repeat steps 1-3 to “braid” the palm fronds until you’ve reached the frond’s end. Finally, place a clear adhesive of choice to affix your palm against the inside of your frame backing. Seal the frame, and your artwork is complete.

REVAMP YOUR DENIM
Grab your favorite thrifted denim and give it new life with a gorgeous downloadable iron-on design. Simply print on transfer paper, cut around the edges of the design, position it face-down on your desired clothing, and apply heat with an iron at a steady pace for about 3 minutes. Make sure to have your clothing item on a hard surface that can withstand heat!

The Host’s Secret Weapon
Our food & wine pairing booklet will help you throw the perfect party with delicious food and curated cocktails!
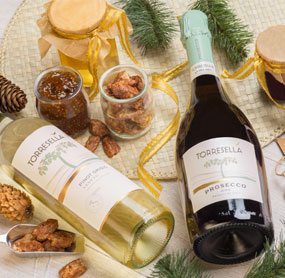
GIFTING 101
Bring out the best of Torresella with fun and easy pairing gifts that will definitely score you another invitation. Match a bottle of Torresella with items such as a jar of jam or nuts, hard cheeses (they pack better) and/or chocolates. Dress up your bottle with a fun gift tag or seasonal items you may already have around the house (ornaments wrapped with twine, ribbon or greenery). Keep the party going with a gift that stands out!

MADE TO ORDER
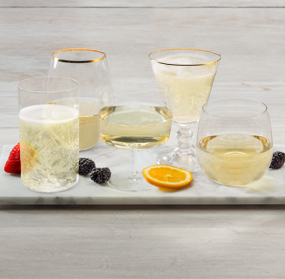
You and your friends are each unique, and the way you enjoy your Prosecco should be too. So for your next gathering, create a Prosecco bar with carafes of fruit juices and small serving bowls of sliced fresh fruit.
Provide inspiration by layering some ingredients in a flute or two, and then let the creativity and memories flow.
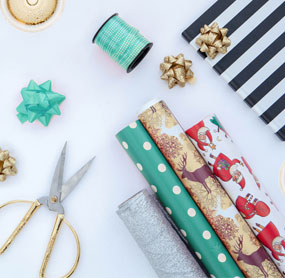
DIY PHOTOBOOTH
Use leftover wrapping paper and ribbon to create a custom backdrop for holiday photos. You can even cut pieces for a patchwork design or save that fancy bow to use as a boutonnière as a fun prop. Pour some Torresella, strike a pose or two and get posting!
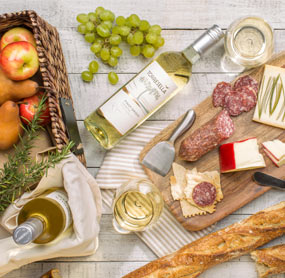
PACK IT UP
Pack a basket, gather some friends, and head outdoors!
- Grab a cooler, basket or canvas tote for your goodies.
- Make life easier by packing things that don’t need a fork! Pre-slice and dice fresh fruits, hard cheeses, savory charcuterie and other antipasto-style snacks.
- Don’t fiddle with a corkscrew! Twist off the cap on a bottle of Torresella Pinot Grigio and enjoy in good company.

BRING ON THE SUN
We all get to enjoy the sunshine this summer! Not only will you get your Vitamin D fix, but this wonderful sunshine allows our winery to be almost entirely self sustaining due to the use of our rooftop solar panels for power.

STYLISH AND SUSTAINABLE
Did you know that the average American throws away around 1,200 pounds of waste each year? Avoid the waste of disposable paper and plastic by using cloth napkins and tablecloths when sharing wine and food. Not only does it look nicer- it really is better for the environment!

Lighter on the Environment
To minimize our environmental impact, Torresella uses lightweight glass and Stelvin screwtop closures for packaging to reduce weight in transport. That means less fuel use and lower CO2 emissions for every bottle we ship.
BYOG (Bring Your Own Glass)
It’s ok to skip the flutes for Torresella Prosecco. At your next gathering, ditch
the wasteful plastic and ask your guests to bring their own glass. Not only
will everyone remember which glass is theirs but mix and match is so in!

No Time Like the Present
Prosecco should be enjoyed young and fresh. The winemaking process (called Charmat) captures Prosecco’s fruity and floral aromas, and like fresh-picked strawberries, the wine benefits from immediate drinking to enjoy the more delicate flavors.
Plus Torresella Prosecco is perfect for all occasions, so don’t save it for later- savor it today!
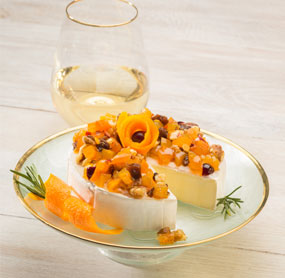
A-Brie-C’s with Torresella
Torresella Pinot Grigio and Brie are a perfect combination and enjoying them together is as simple as:
Always have a bottle Torresella ready to share.
Brie should be set out about 15 minutes before serving to let it warm and soften.
Create an impressive and delicious presentation with dried apricots, almonds, or fresh berries.

Set the mood with a toast
- Start the occasion right by always offering a cheers before the first sip.
- Always make eye contact when offering a toast.
- Have a toast idea or two ready. Recollect a favorite quote, a sage piece of advice, or even a favorite song lyric, in homage to the occasion.

The Final Sip
If you want it, offer it to a guest first. Their good manners should steer that precious taste right back to you.
Keep Recipes Simple
A mix of store-bought and homemade appetizers keeps you from getting stuck in the kitchen. Pre-cut fruit and veggies taste better when you didn’t spend hours slaving over them!
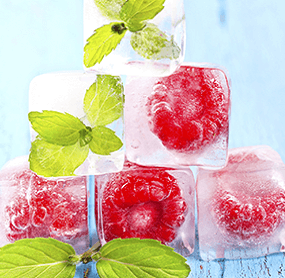
Unconventional Ice Cubes
Try freezing fruit such as grapes, strawberries, or blueberries, or make frozen wine cubes out of the wine itself to keep your wine cool without watering it down.

Just Chill
Have a room-temperature bottle that needs to be cooled quickly? Try an ice bucket filled with ice and water, or wrap a wet paper towel around the bottle and place in the freezer. Once your wine reaches the perfect temperature it’s ready to be served. Don’t forget to hold the glass by the stem to avoid warming it with your hands. (Pinky lift optional.)
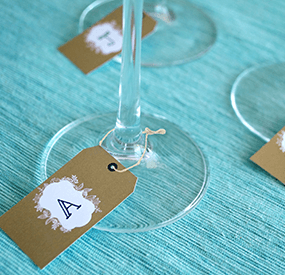
Don’t lose your glass
Skip the game of “Which one’s my glass?” Have stickers, ribbon or blank name tags available for guests to mark their own.
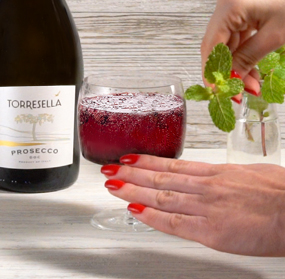
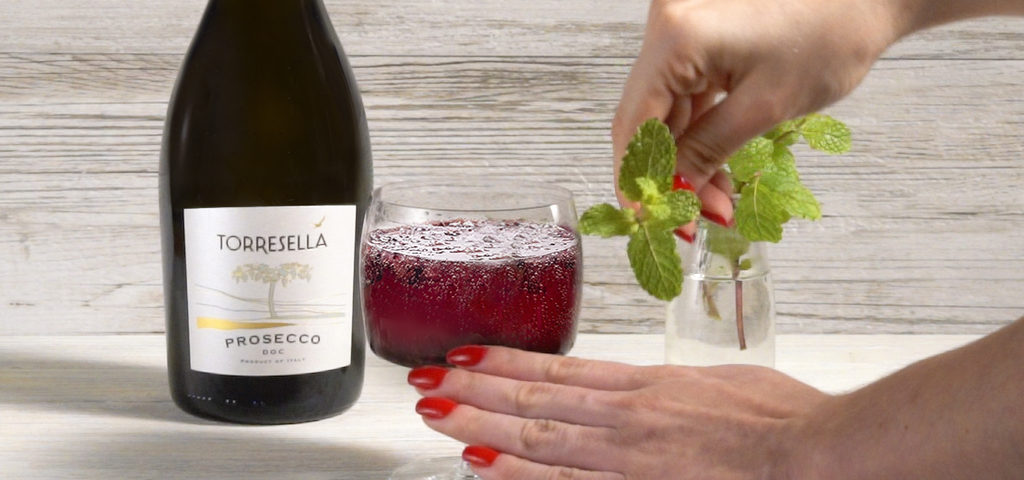
Mint 101
Get the most flavor out of your mint with this trick! Simply smack the mint leaf against your hand to extract the oils, then add to your cocktail or use as a garnish.